REVIEW · GEIRANGER
Geiranger Fjord: Downhill Self-Guided Bike Tour
Book on GetYourGuide →Operated by Excursions.no · Bookable on GetYourGuide
One spectacular road down, one unforgettable fjord view up. This Geiranger Fjord downhill bike tour pairs a simple setup with serious scenery. I love that you start high above Geiranger and roll down at your own pace, and I especially love the built-in photo target at Flydalsjuvet, where the fjord looks almost unreal.
Here’s the trade-off: this is self-guided on a busy main road, so you need bike confidence and you’ll want good weather (or at least good judgment in rain and wind). With that mindset, it’s a fantastic way to see Geiranger Fjord from a totally different angle without spending your whole day commuting between viewpoints.
In This Review
- Key Highlights You’ll Actually Feel
- The Big Idea: A Downhill Fjord Ride Without the Usual Tour Bus
- Where You Meet and How the Ride Gets Going
- The Downhill Start at Djupvatnet Lake: Why Height Matters
- Flydalsjuvet: The Fjord View You Don’t Want to Skip
- The Ride Experience on a Busy Main Road
- How the Timing Actually Works (3 Hours Total, 2.5 Riding)
- Weather and Road Closures: When the Day Changes
- What You Get (and Why It’s Good Value for This Route)
- What to Bring: Don’t Underpack for Fjord Wind
- Who This Bike Tour Suits Best
- Downsides to Plan For (So You Don’t Get Surprised)
- A Quick Decision Guide: Should You Book It?
- FAQ
- Do I need to be able to ride a bike?
- How long is the tour, and how much time do I ride?
- Where do I meet for the tour?
- Is there a guide accompanying me during the ride?
- What is included in the price?
- What should I bring?
- What happens if the road to Djupvatnet Lake is closed?
- What ages are allowed?
Key Highlights You’ll Actually Feel
- Djupvatnet Lake start (1,030 meters): a big elevation drop that turns the ride into a true downhill experience
- Flydalsjuvet viewpoint time: your main photo stop for dramatic fjord angles
- Your pace, your stops: you can pause for pictures and still finish on time
- Small group (up to 8): easier logistics and a calmer start than huge tour buses
- Weather-dependent route: the day can change if road conditions aren’t right, including an alternate start
The Big Idea: A Downhill Fjord Ride Without the Usual Tour Bus
This tour is built around one goal: get you up to a high starting point, then let you cruise downhill through one of Norway’s most famous road settings. You meet in Geiranger village, get safety instructions and gear, and then you’re driven up to Djupvatnet Lake at 1,030 meters above sea level.
Once you’re up there, the ride becomes the experience. You’re not rushing a packed itinerary or stacking museum stops. Instead, you’re moving through the landscape—fjords, cliffs, and viewpoints—while your bike does the work. If you’ve ever looked at photos of Geiranger Fjord from above and wondered what it feels like in real time, this is one of the most practical ways to find out.
The tour is also refreshingly simple. You’re given the essentials—bike, helmet, bicycle gloves, and a visibility vest—so you aren’t worrying about renting gear or sorting safety basics. And because it’s self-guided, you don’t have to follow a fast-moving group for the sake of staying “on schedule.”
You can also read our reviews of more tours and experiences in Geiranger.
Where You Meet and How the Ride Gets Going
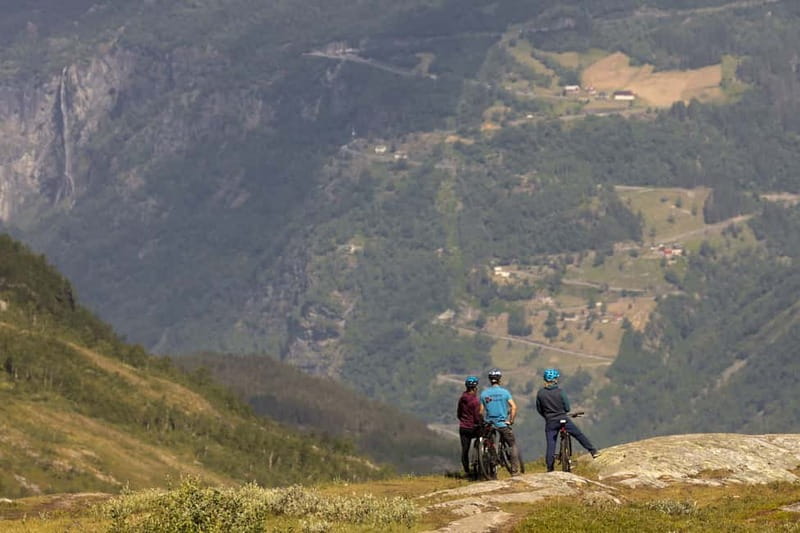
You’ll meet at Geirangervegen 10, right before Cafe Ole in Geiranger. It’s a straightforward meeting point that makes it easy to find, especially if you’re also using the village area as your base.
Before you roll, you’ll do a short safety talk and get kitted out. The tour includes an English-speaking instructor for that part, so you’ll get the rules you need before you’re left to ride on your own.
Then comes the practical payoff: transport. You won’t pedal the climb. You’re driven up to the starting location, and that matters because it keeps the experience focused on downhill scenery rather than turning it into a leg-burning trek. Total duration is listed as 3 hours, but the riding time is around 2.5 hours—so you’re not spending your whole day tied to a schedule.
Small group matters too. With a maximum of 8 participants, you’re less likely to feel like you’re joining a mass departure. That makes a difference when you’re also trying to line up bikes, listen to instructions, and start smoothly.
The Downhill Start at Djupvatnet Lake: Why Height Matters
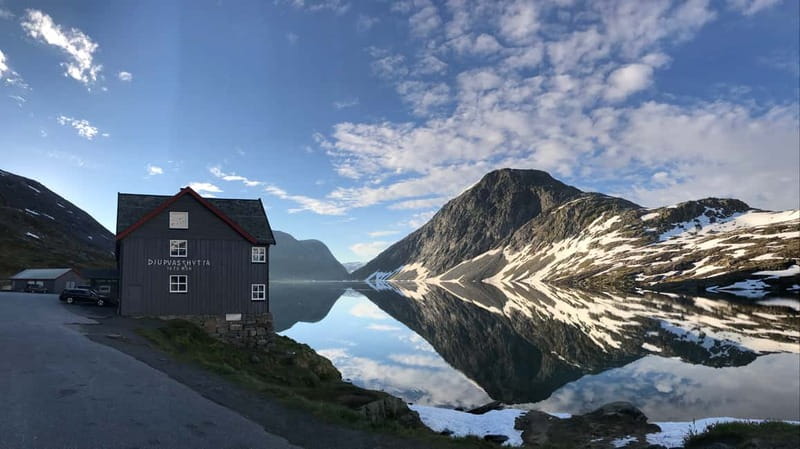
The ride begins at Djupvatnet Lake, and the starting altitude—1,030 meters—isn’t a trivia detail. It’s what makes this tour feel like a “real” downhill. You’re high enough to see the fjord system opening up, plus you’re far enough from the village that the views read as big and dramatic instead of crowded and postcard-like.
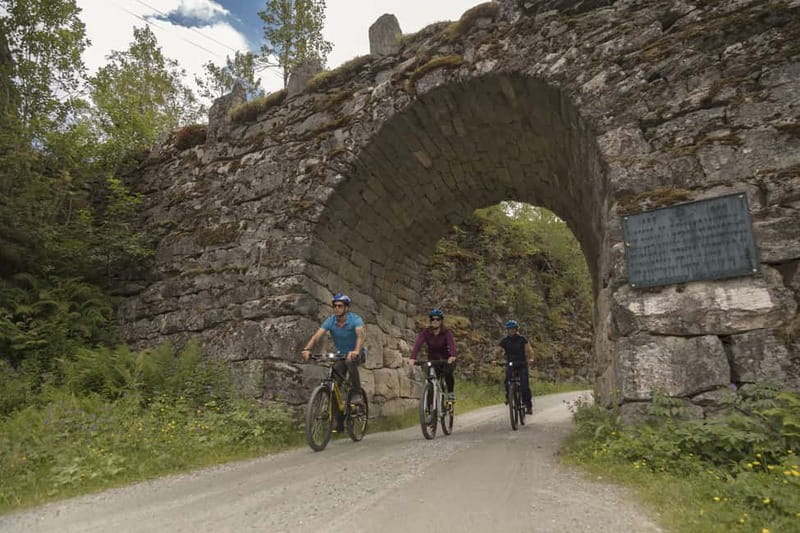
From the beginning, you’ll be surrounded by Norway’s classic fjord-road scenery: steep drops, rocky edges, and long sightlines when the weather cooperates. Even when visibility isn’t perfect, the sense of being above the fjord is a big part of why this route is memorable.
And this is where your bike confidence really matters. You’re not dealing with a flat path; you’re dropping into a roadway environment. That means you should be comfortable with:
- braking safely and steadily downhill
- scanning ahead for vehicles
- handling wind gusts that can come off the water and cliffs
If any of those sound unfamiliar, consider practicing basic braking and control before you ride out—because on this kind of descent, confidence beats speed.
Flydalsjuvet: The Fjord View You Don’t Want to Skip
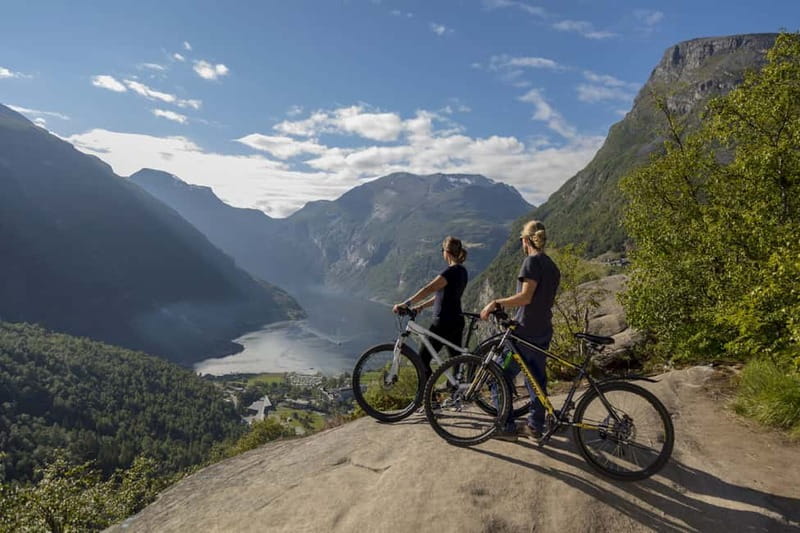
If you only remember one stop from this tour, make it Flydalsjuvet. It’s the viewpoint you’re encouraged to stop for, and it’s often where the photos look like a different planet compared with street-level fjord views.
You’ll cycle the sinuous fjord roads and make time to stop for pictures along the way. Flydalsjuvet is the standout because it gives you a stronger angle on the fjord and the surrounding slopes than many roadside pull-offs. In practical terms, it’s one of those stops where you’ll understand why people plan whole days around this area.
What I like about this setup is that you’re not forced into one short, rushed photo opportunity. You can pause when you want, take a few minutes to adjust your photos, and then move on. In the bike-tour world, that kind of flexibility is gold.
One more reality check: you’re riding on a road with traffic. That means if you stop, you’ll want to do it safely—out of the flow, with attention on what’s behind you. Plan your photo stop like a rider, not like a pedestrian.
The Ride Experience on a Busy Main Road
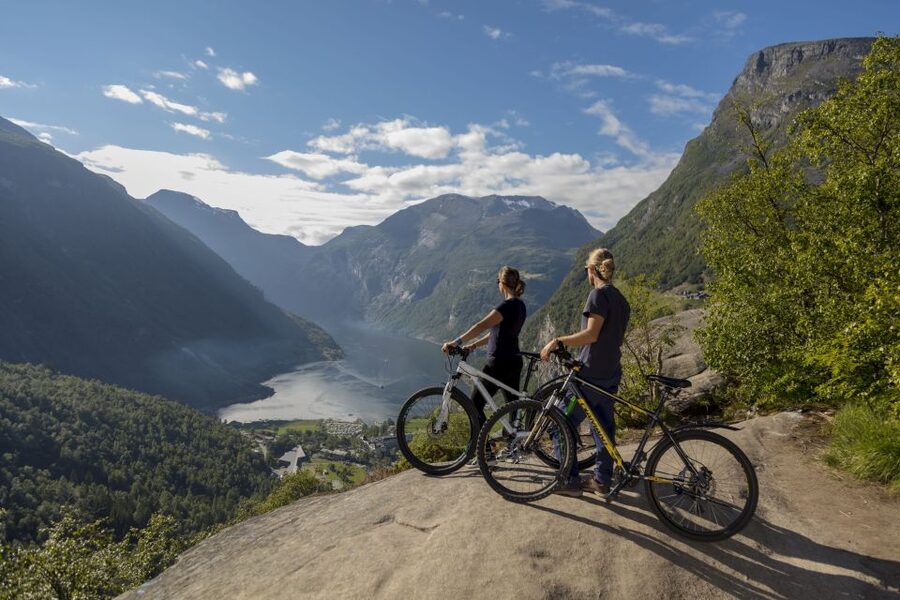
This is one of the main differences between this tour and the kind of mountain biking that people might imagine. You’re not on a dedicated trail. You’re on a famous road system shared with other vehicles.
That shows up in two ways:
- You’ll need to ride defensively, especially in busier periods.
- You’ll likely stop more often than you think, because you may have slower traffic moments and you’ll want clear breaks for photos.
In busy peak season, the road can include large touring vehicles and camper vans, so don’t expect a quiet cycling bubble. The upside is that you’re riding through the same dramatic landscape that everyone comes to see—so even slower sections still feel meaningful.
If you’re comfortable riding in traffic and you can stay calm when you’re sharing space with bigger vehicles, you’ll enjoy this tour a lot more. If you hate cars, want off-road separation, or expect a mostly trail-based experience, you may find the road format less satisfying.
How the Timing Actually Works (3 Hours Total, 2.5 Riding)
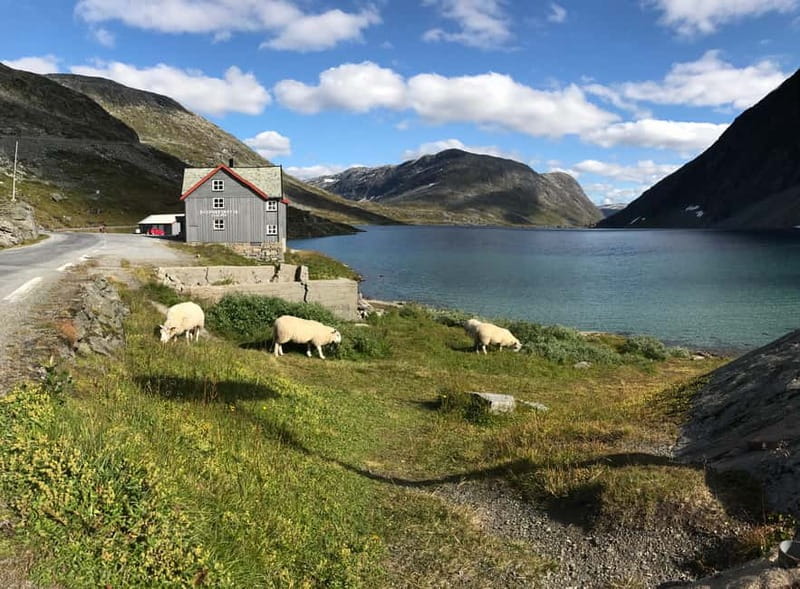
The schedule is simple. You’ve got about 3 hours total, and the cycle portion is around 2.5 hours. That means you’re not locked into an all-day commitment. You also have enough time built in for breaks—especially for the signature viewpoints.
Because it’s self-guided, the “time pressure” comes from the route flow, not a guide trying to herd you. You’re not receiving constant directions. Instead, you’re experiencing the downhill sections, choosing when to pull over for photos, and keeping an eye on traffic and road conditions.
In practice, this timing works best if you:
- plan for at least one longer photo stop (Flydalsjuvet)
- keep quick stops short so you don’t stack delays
- stay aware of weather—wind and rain can slow you down
Weather and Road Closures: When the Day Changes
This tour depends on good weather conditions. That’s not just about comfort—Norway’s roads can get slippery, and fjord wind can make handling harder. If it’s raining hard, you should take extra care. Heavy rain may still produce stunning views for some riders, but your control and visibility matter most.
The tour also has a smart contingency. If the road to Djupvatnet Lake is closed, you’ll start from an alternative point at Eagle Bend viewpoint. You’ll still get that “from above” fjord perspective and you’ll still be cycling downhill through the area, just with an altered start.
So when you’re deciding whether to book, treat weather as part of the planning—not an afterthought. Bring the right layers and be ready for changes.
What You Get (and Why It’s Good Value for This Route)
At $156 per person for about a half-day outing, you’re paying for more than just a bike rental. You’re getting:
- transport to the starting point
- the bike
- helmet, bicycle gloves, and a visibility vest
- an English-speaking safety talk
- a small group setup
That package makes sense here because the hardest part—getting up to 1,030 meters—would be a pain on your own. The transport saves you both time and effort, and it keeps the tour focused on the scenic downhill ride.
You’re also not paying for a guiding service along the route. That’s a plus if you like self-paced travel. But it also means you’re responsible for your own decisions on the road, especially in traffic. So the “value” is real, but it comes with the rider mindset.
What to Bring: Don’t Underpack for Fjord Wind
You’ll want to pack like the weather can shift quickly—and like you’ll be outside for long enough that cold and wind add up. Bring:
- warm clothing
- windbreaker
- snacks and water
- sportswear
Even though the ride is downhill, the altitude start and the open road environment can make it feel colder than you expect. The wind can be the deciding factor in comfort, so a windbreaker isn’t optional fluff—it’s the difference between enjoying the ride and shivering through viewpoints.
Also, bring enough water for the full ride time. You’ll likely make multiple photo stops, and having water on hand keeps things smooth.
Who This Bike Tour Suits Best
This experience is best for people who:
- can ride a bike comfortably
- want to experience fjord scenery from above without a full day of hiking
- enjoy self-paced travel and don’t mind planning your own photo breaks
- feel confident riding on a shared road with vehicles
It’s also a good fit if you’re using Geiranger as a base and want a high-impact activity that doesn’t require hours of commuting between stops.
On the other hand, it’s not designed for everyone. It’s listed as not suitable for:
- children under 12 (and minors can’t go unaccompanied)
- people with back problems
- people with heart problems
If any of those apply, it’s worth choosing a different fjord activity that’s better matched to your comfort and safety needs.
Downsides to Plan For (So You Don’t Get Surprised)
Let’s be honest about the main considerations:
- No guide rides with you. You get instructions, then you’re on your own. That’s great for independent travelers, but you need to stay attentive.
- Traffic on a main road. This isn’t a secluded trail. You’ll have to ride defensively and may need to pause more than planned.
- Weather matters. Rain and wind can make the ride harder, even if the scenery still looks dramatic.
There’s also the “mental expectation” gap. If you’re picturing dedicated mountain bike tracks, you might feel the ride is more about road cycling through spectacular scenery than technical off-road biking. The experience still works—but it won’t match every fantasy.
A Quick Decision Guide: Should You Book It?
I’d book this Geiranger Fjord downhill bike tour if you want a practical, scenic route that mixes major viewpoint energy (especially Flydalsjuvet) with the freedom of self-guided pacing. The included bike and safety gear, plus the transport up to Djupvatnet Lake, make it a good value for what you actually get: a high-altitude start and a downhill fjord ride that’s the opposite of tourist-bus fatigue.
Don’t book it if you:
- want a dedicated mountain bike trail
- need a fully guided experience on the road
- aren’t comfortable sharing a famous roadway with traffic
- aren’t confident riding in rain or wind
FAQ
Do I need to be able to ride a bike?
Yes. You must be able to ride a bike for this tour.
How long is the tour, and how much time do I ride?
The total duration is 3 hours, and the cycle lasts about 2.5 hours.
Where do I meet for the tour?
Meet at Geirangervegen 10, directly before the coffee shop Cafe Ole.
Is there a guide accompanying me during the ride?
No. There is no guide on the bike route. You’ll have a safety talk and then ride self-guided.
What is included in the price?
Transportation to the starting point, the bike, helmet, bicycle gloves, and a visibility vest are included.
What should I bring?
Bring warm clothing, a windbreaker, snacks, water, and sportswear.
What happens if the road to Djupvatnet Lake is closed?
If the road is closed, you’ll be offered an alternative starting point from the Eagle Bend viewpoint.
What ages are allowed?
You must be at least 12 years old, and you must be accompanied by an adult. Unaccompanied minors aren’t allowed.