REVIEW · BIG ISLAND OF HAWAII
Fat Tire E-Bike Rental – Volcanoes National Park
Book on Viator →Operated by Volcano Ohana · Bookable on Viator
E-bikes turn Volcanoes National Park into quick loops. This rental model lets you pedal less and explore more, rolling through park roads and trails at your own pace, starting from the Overflow lot next to Kilauea Lodge and Restaurant.
I like two things a lot here: the setup and safety focus from staff (Bill and Julie are specifically mentioned), and the fact you get 3 hours of self-paced park time instead of waiting around for others.
One drawback to plan for: there are no beginner bike lessons, and if you can’t comfortably ride the heavier fat tires, the policy notes that this does not qualify for a refund.
In This Review
- Quick Hits Before You Go
- Volcanoes National Park on Fat Tire E-Bikes: Why This Works So Well
- Pickup at Kilauea Lodge Overflow: Timing and Where You Must Be
- Two time blocks to plan around
- What You Actually Get: Helmet, Lock, Bike Pack, and a Demo Video
- Small but useful details: carry and storage
- Helmet note
- Riding Setup: How the E-Bike Feels and How to Not Fight the Bike
- A practical tip for your first few minutes
- Intermediate rider recommendation
- Your 3-Hour Self-Guided Plan: How to Spend It Like a Local
- The value of “explore at your pace”
- Safety and Park Rules: When Cars Mix With Bikes
- Weather Reality: Bring Layers and Rain Gear
- Price and Value: Is $125 Worth It for Three Hours?
- Who This Works Best For (And Who Should Think Twice)
- Should You Book This Fat Tire E-Bike Rental?
- FAQ
- Where do I pick up the Fat Tire E-Bike rental?
- What time slots are available for the 3-hour rental?
- How long is the rental, and where do I return the bike?
- Is the Volcanoes National Park entrance fee included in the $125 rental price?
- What’s included with the rental?
- Do I get beginner bike lessons with this rental?
- What rider experience do I need?
- Is it okay to cancel last minute?
Quick Hits Before You Go
- Overflow lot pickup: no storefront, so you must find the meeting spot fast at your start time.
- Two riding windows: morning 8:45 am–12:00 pm, afternoon 12:15 pm–3:30 pm.
- Fat tire traction + e-assist: you can cover more ground with less strain.
- Bike pack + lock included: you can carry basics and secure the bike when needed.
- Park fee is separate: admission to Volcanoes National Park costs extra at $15 per person.
- Cars share the road: you’ll ride on routes where vehicles can be around—stay alert.
Volcanoes National Park on Fat Tire E-Bikes: Why This Works So Well
Volcanoes National Park is popular, and popular usually means traffic, limited parking, and the slow grind of getting from one viewpoint to the next. This rental sidesteps a lot of that by letting you move inside the park without hunting for a spot every time you want a photo or a short walk.
What makes this experience appealing is the combo of fat tires and electric assist. You’re not stuck doing constant hard pedaling. Instead, you can concentrate on pacing yourself, learning how the bike responds, and choosing the parts of the park you want to spend time on. The service also matters: the team positions everything around a scheduled pickup so you’re not standing in a line all morning.
That said, this is still a bike experience. You’ll be riding real terrain, and the e-bike makes it easier, not effortless. You’ll get instructions and a demo video, but you should come ready to ride confidently.
You can also read our reviews of more tours and experiences in Big Island of Hawaii.
Pickup at Kilauea Lodge Overflow: Timing and Where You Must Be
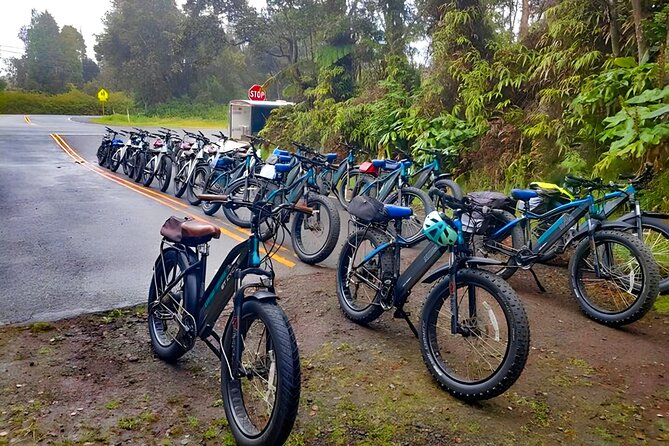
This is a no-nonsense operation. You collect your rental at the OVERFLOW parking lot adjacent to Kilauea Lodge and Restaurant. There isn’t a shop with a storefront, so plan to arrive early and locate the staging area before your time window begins.
Here’s the big rule: they’re only available for scheduled pickups. If you aren’t at the meeting spot at your start time, they won’t be there to meet you, and you won’t receive a refund. Also, they start immediately after bike rentals are picked up. That means you can’t treat pickup like a casual stroll.
The good news is the location is very workable. Multiple guides and staff are described as organized and helpful, including safety-focused coaching during the handoff. People also mention pickup and drop-off as easy, which matters if you’re juggling the rest of your Big Island day.
Two time blocks to plan around
- Morning rental: 8:45 am to 12:00 pm
- Afternoon rental: 12:15 pm to 3:30 pm
You’ll finish back at the same meeting point.
If you’re staying near Volcano Village or spending time around Kilauea Lodge, this timing is convenient because it gives you a clean half-day slice for other plans too.
What You Actually Get: Helmet, Lock, Bike Pack, and a Demo Video
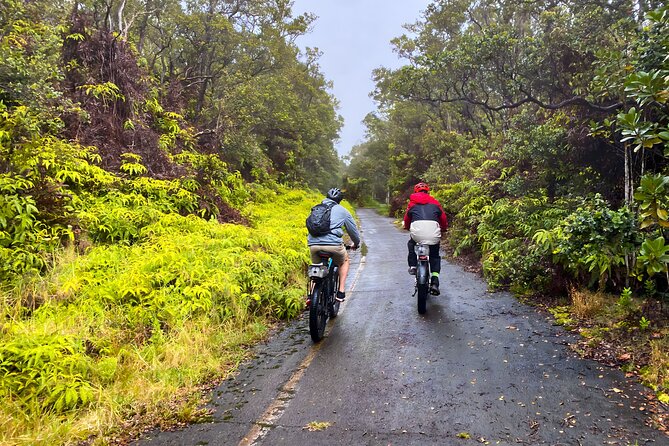
The rental includes:
- Use of the e-bike
- Helmet
- Lock
- Bicycle pack (for carry items)
You also get a demonstration video before you roll out. That’s important because the e-bike experience is partly about comfort and partly about control. A few reviews point out how thorough the bike explanation can be, and names like Bill and Nicole show up in that context.
Small but useful details: carry and storage
The bikes come with saddle packs. That means you can keep essentials close—phone, wallet, small snacks, or water—without turning the ride into a luggage mission. If you’re planning to snack during breaks, I’d treat that as part of your pre-ride prep. Some people note they wished they brought water and snacks beforehand because everything gets packed up around the rental handoff.
Helmet note
One review mentioned a helmet smell issue. The response from the company says helmets are washed weekly, and that the problem was resolved. Still, it’s worth doing the common-sense check: if the helmet feels off, ask right away.
Riding Setup: How the E-Bike Feels and How to Not Fight the Bike
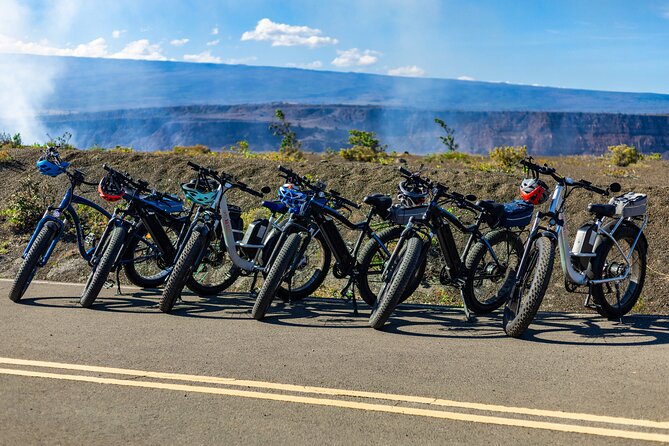
These e-bikes are powerful and user-friendly, but they’re also described as heavy geared. That’s the reason this rental works best for cyclists who already feel comfortable on a bike with changing speeds.
You’ll get a warm-up period to get the feel, and that’s where you want to spend your attention. One person mentioned a customer toppling during warm-up before the ride even started, which is a reminder that the setup is real riding, not a stroll.
A practical tip for your first few minutes
A review offers a very useful trick: set the pedal assist setting (PAS) to zero when starting from a complete stop. Then figure out if you want assist right away, or if you prefer using the throttle. That tip helps you avoid sudden acceleration while you’re getting balanced.
Intermediate rider recommendation
The rental specifically recommends intermediate or better bike riders. If you’re new to biking or you haven’t ridden a bike with shifting gears, you may end up stressed—especially on steeper or uneven park sections.
And one more important reality check: if you rent the bike and you can’t ride it, that does not qualify for a refund. So make the decision before you show up.
Your 3-Hour Self-Guided Plan: How to Spend It Like a Local
This isn’t a group tour with a fixed sequence of guided stops. It’s a rental designed so you can explore your way. That’s a big deal in Volcanoes National Park, where traffic and crowds can steal your time even when you’re trying to be efficient.
Think of your 3 hours in three phases:
Phase 1: Get rolling and get confident (first 15–30 minutes)
Start by practicing smooth starts, comfortable speed changes, and how the bike responds when you use assist. Use this time to settle your grip, posture, and braking habits. If rain is in the forecast, this is also when you should decide what layers to wear and how you’ll stay warm.
Phase 2: Hit your priority park spots (the middle chunk)
During the main portion of your rental, you’ll be connecting park roads and trail sections that vehicles can’t reach in the same way. That’s the payoff. You can often move faster than cars and pedestrians in the right stretches, which helps you see more without feeling rushed.
Because the route plan depends on your interests, your best strategy is to pick a few must-do viewpoints or areas and then leave buffer time for detours or short hikes. The bike pack helps you keep essentials nearby, so you’re not planning your ride around parking and bags.
Phase 3: Return with time to spare (final 20–30 minutes)
Plan your return so you’re not arriving at the end of the window stressed. Since pickup and operations are scheduled and they start immediately after rentals are collected, you’ll want a calm finish.
The value of “explore at your pace”
This is the reason people call this the only way to travel in the park. You’re not stuck with other people’s pace, and you can take breaks when the light changes or when you find a spot you want to spend extra minutes.
Safety and Park Rules: When Cars Mix With Bikes
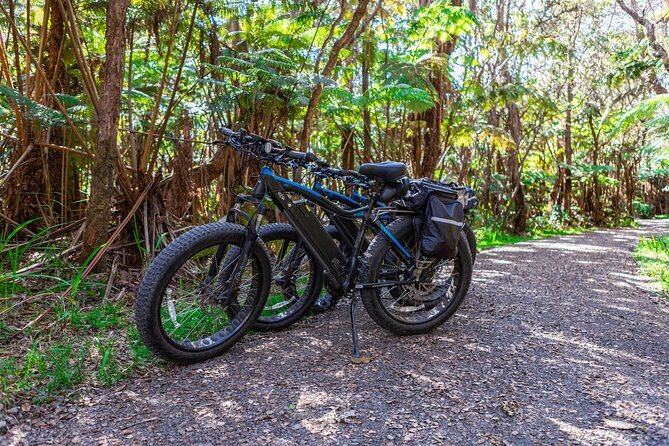
You may ride on roads with cars. That means your experience isn’t just about the bike—it’s also about road awareness. The company asks renters to follow all park rules and regulations, and they place responsibility on you to ride safely.
Here are smart habits that keep your ride smooth:
- Keep your speed controlled, especially in mixed traffic areas.
- Watch for openings to merge or turn, and don’t assume cars see you immediately.
- Give yourself extra space in wet conditions. Braking behavior can feel different when the ground is slick.
The staff’s safety focus shows up in reviews, and you’ll likely get clear instructions before you start. Use that time. Ask questions if something feels unclear before you commit to the park route.
Weather Reality: Bring Layers and Rain Gear
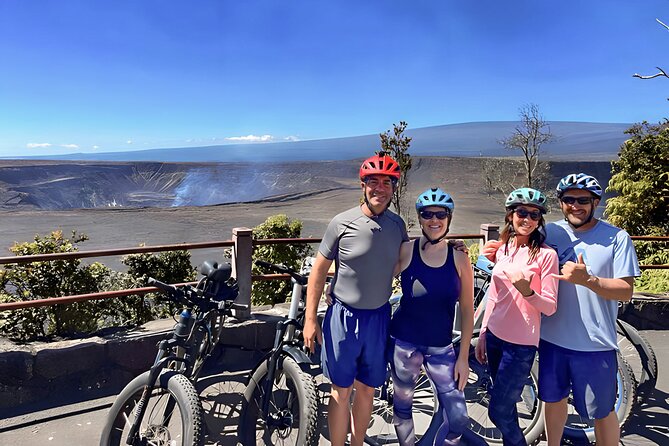
The park weather can shift fast, and multiple reviews mention rain and cold. That matters more on an e-bike than you might expect. Even though you’re not pedaling hard, wind exposure and time outside can make you feel chilly.
A few tips that come straight from real ride advice:
- Bring layers so you can adjust as the sky changes.
- Pack rain gear if rain is forecast. One review explicitly calls out how cold it can get and recommends good rain gear.
- If it’s raining, take your practice time seriously. Settle into your rhythm before you start moving faster.
The good part: people say rain didn’t stop them from enjoying the highlights. You just need to dress for the conditions instead of hoping for perfect weather.
Price and Value: Is $125 Worth It for Three Hours?
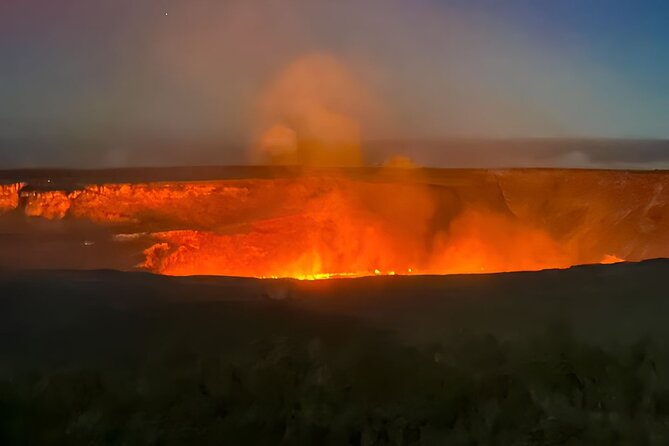
At $125 per person for about 3 hours, this is a premium rental compared to basic bike options. But it can still be a strong value because you’re paying for three practical things:
- Time savings: you can beat some of the traffic and crowd friction inside the park.
- Effort reduction: e-assist means you can cover more of the park without arriving exhausted.
- Convenience: a lock, helmet, and bike pack are included, so you’re not scrambling for gear.
Two cost notes matter for your budget:
- The rental fee does not include the Volcanoes National Park entrance fee.
- Admission is $15 per person, which you pay at the park entrance or cover with a National Parks pass or Active Military ID.
So your real all-in cost is the rental fee plus park admission unless you already have an eligible pass.
Also note demand. This gets booked in advance (on average around 27 days), so waiting until the last minute can shrink your options—especially if you’re aiming for a specific time block.
Who This Works Best For (And Who Should Think Twice)
Best fit:
- You’re comfortable riding a bike and can handle gears and speed changes.
- You want to explore independently without being locked to a group.
- You like the idea of covering multiple park areas without dealing with parking hunts.
- You’re traveling in pairs or a small group and want flexibility.
Not ideal if:
- You need beginner instruction. Beginner lessons are not included.
- You’re not confident on a heavier geared bike.
- You expect an easy walk-and-photo rhythm with zero riding effort.
One review also mentions that comfort on a heavier geared bike really matters, and that a senior rider had trouble during warm-up. That’s not meant to scare you, just to help you judge your comfort level honestly before you go.
Should You Book This Fat Tire E-Bike Rental?
Book it if you want the park to feel fast and free: you’ll get 3 hours, a powerful e-bike, and the chance to access areas that vehicles can’t. This is especially smart if you hate wasting time in traffic or you prefer controlling your own pace.
Pass on it if you’re truly brand-new to biking, or if you’re the type who gets stressed by shifting and mixed road situations. With no beginner lessons and a rider-ability expectation, you’ll be happier choosing a different type of activity.
If you do book, your biggest win will come from simple prep: arrive early, check your meeting spot, wear rain-ready layers, and spend a little time learning the e-bike response at the start.
FAQ
Where do I pick up the Fat Tire E-Bike rental?
You pick up the rental at the OVERFLOW parking lot adjacent to Kilauea Lodge and Restaurant. There is no store front.
What time slots are available for the 3-hour rental?
You’ll choose either the morning window (8:45 am to 12:00 pm) or the afternoon window (12:15 pm to 3:30 pm).
How long is the rental, and where do I return the bike?
The rental is for 3 hours. The activity ends back at the same meeting point where you started.
Is the Volcanoes National Park entrance fee included in the $125 rental price?
No. The Volcanoes National Park entrance fee is separate and costs $15.00 per person.
What’s included with the rental?
You get the use of the bicycle, a helmet, a lock, and a bicycle pack.
Do I get beginner bike lessons with this rental?
No. Beginner bike lessons are not included.
What rider experience do I need?
The rental recommends intermediate or better bike riders. If you are unable to ride the bicycle, that does not qualify for a refund.
Is it okay to cancel last minute?
Cancellation is free up to 24 hours before the experience starts for a full refund. If you cancel less than 24 hours before, the amount you paid is not refunded.